


Use this class practical to investigate what happens to potatoes and potato cells when they are boiled
In this experiment, students examine a sample of potato before and after boiling it. They look closely at the potato under a microscope to see what happens to the cells and different parts of the cell, and think about why the potato looks, feels and tastes different.
The activity takes at least 30–40 minutes.
Students need to know the structure of a plant cell, or should be reminded of it at the start of the lesson.
For students who struggle with practical work – or who you do not trust with very sharp scalpels, you can have the potato already cut into pieces and into very thin slices. These slices do not keep and dry out very quickly, so this cannot be done much in advance of the lesson.
Having a kettle with boiling water helps to cut down the time.
Students can be looking at one sample under the microscope while another is boiling, if they can do this and keep track of the time.
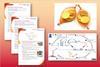
It may help students if you set up a digital microscope that links to a television or computer – particularly if you can project the images. Students with particularly good slides could show theirs to the class. You can then discuss with students what changes are taking place. This is better done alongside a class practical than instead of it.
Equipment
Apparatus
- Eye protection
- Microscope
- Microscope slides and cover slips, at least 3
- Knife (see note 5 below)
- Sharp scalpel (see note 6)
- Beaker, 250 cm3
- Bunsen burner
- Tripod
- Gauze
- Heat resistant mat
- Timer
- Forceps or tongs
Chemicals
- Potato
- Iodine solution 0.01 M, either in a dropper bottle or with an eye dropper
Health, safety and technical notes
- Read our standard health and safety guidance.
- Wear eye protection throughout.
- Potato – one average sized potato is required per four or five groups.
- Iodine solution, I2(aq) – see CLEAPSS Hazcard HC054 and CLEAPSS Recipe Book RB050. The exact concentration of the iodine solution is not critical.
- The knife can be an ordinary table knife, although a sharper one can be easier.
- The scalpels need to be very sharp. Very thin (less than 1mm) slices can be cut for students who struggle to use the scalpels safely, but they do not keep so this cannot be done much in advance of the lesson.
Procedure
- With the knife cut two 2 cm chunks of potato without any skin. Try to make the pieces roughly the same size. Cut another small piece of potato about 1 cm thick.
- Using a very sharp scalpel, carefully cut a very thin piece of the potato from the 1 cm chunk. You are aiming for just one cell thick and the potato slice needs to be less than 1 mm thick.
- Put your very thin slice of potato onto a microscope slide, add 1 drop of iodine solution and put a cover slip onto it.
- Look at the potato under the microscope using a magnification of about x100 (this is usually medium power).
- Half-fill the beaker with water and bring it to the boil. When it is boiling, add the two large chunks of potato and start the timer. Remove one piece after two mins and the other after 10 minutes.
- Cut a very thin slice from each of the pieces of potato, mount them on slides with iodine and look at them under the microscope. It can be hard to cut a good slice from the potato after boiling it for 10 minutes, but by this stage you can help to make the sample thinner by ‘squishing’ it with the cover slip. Note how these slices differ from the original slice.
Teaching notes
To help students make good observations, it is a good idea to ask them to draw a cell or two from each slide. Get them to use the same magnification each time and to try and keep their drawings to scale. Tell them to look for the differences between each potato sample and try to see which parts of the cell have changed. They can describe in words what is happening as the potato is cooked, what happens to the texture of the potato as it is cooked and try to explain from their results why these changes happen.
As the potato is cooked the cell membrane ruptures; the membrane around the vacuole breaks; the membrane around the starch grain breaks and the starch grain swells up, although it initially remains intact; the cell wall breaks down and the contents, including the starch, begin to disperse.
The first two can be difficult to see under the microscope. The cell membrane is very thin and is probably in close contact with the cell wall. The latter two points show up very well. The starch grains noticeably swell and with the iodine staining you can see them clearly. You can also see that the starch remains in the cells. As time progresses, the iodine stained starch begins to spread into gaps between cells and the grains no longer have a distinct spherical shape. You can see some breakages of the cell walls.
As the potato is cooked its texture becomes softer and ‘squishier’.
The reason for the change in texture is the rupturing of the cell walls. When they are intact they hold the potato in a rigid shape. They are strong and hard to break just by gently pressing on the potato. As the walls break down they no longer have a strong rigid structure. There are breaks in structure and these allow the potato to begin to collapse, which gives the softer, ‘squishier’ texture.
Additional information
This is a resource from the Practical Chemistry project, developed by the Nuffield Foundation and the Royal Society of Chemistry.
Practical Chemistry activities accompany Practical Physics and Practical Biology.
© Nuffield Foundation and the Royal Society of Chemistry


No comments yet